

In this blog post, I show step-by-step how to set up a continuous code quality inspection environment for a PL/SQL project hosted on GitHub. I’m going to use a Docker container for SonarQube and another container for Jenkins.
Here is the table of contents of the major steps.
- Install Docker
- Create SonarQube and Jenkins Container
- Install PL/SQL Cop for SonarQube
- Install PL/SQL Cop (Command Line Utility)
- Configure SonarQube
- Configure Jenkins
- Create Code Analysis Job
- View the Result in SonarQube
- Summary
In the summary of this post, you find an audio-less video completing the process within 3.5 minutes.
1. Install Docker
I’m assuming that you already have installed Docker on your machine. If not, download and install the free Docker Community Edition including Docker Compose. I’m going to use Docker for Mac. But you may use Docker for Windows or a Docker server for one of the various supported Linux distributions. It is also possible to use a cloud provider, but the installation procedure will differ slightly.
You are ready for the next steps when the command
docker run --rm hello-worldproduces this output
Hello from Docker!
This message shows that your installation appears to be working correctly.

To generate this message, Docker took the following steps:
1. The Docker client contacted the Docker daemon.
2. The Docker daemon pulled the "hello-world" image from the Docker Hub.
3. The Docker daemon created a new container from that image which runs the
   executable that produces the output you are currently reading.
4. The Docker daemon streamed that output to the Docker client, which sent it
   to your terminal.

To try something more ambitious, you can run an Ubuntu container with:
 $ docker run -it ubuntu bash

Share images, automate workflows, and more with a free Docker ID:
 https://cloud.docker.com/

For more examples and ideas, visit:
 https://docs.docker.com/engine/userguide/
in your terminal window.
2. Create SonarQube and Jenkins Container
In this step, we create a container for SonarQube and another one for Jenkins. Jenkins will need to communicate with SonarQube. Docker Compose allows us to use hostnames instead of hard-coded IP addresses and to manage all involved containers together in a single YAML configuration file.
Create a “docker-compose.yml” file in a “plsqlcop” directory. The directory name is used to derive names for containers and volumes. In this case, the volumes will be named “plsqlcop_sonardata” and “plsqlcop_cidata”. For the container names, the default naming has been overridden.
version: "3.0"
services:
   sonar:
      image: "sonarqube:5.1.2"
      container_name: "sonar"
      environment:
         - SONARQUBE_JDBC_USERNAME=sonar
         - SONARQUBE_JDBC_PASSWORD=sonar
         - SONARQUBE_JDBC_URL=
      ports:
         - "9010:9000"
      volumes:
         - "sonardata:/opt/sonarqube/data"
   ci:
      image: "jenkins/jenkins:2.79"
      container_name: "ci"
      ports:
         - "9020:8080"
      volumes:
         - "cidata:/var/jenkins_home"
volumes:
   sonardata:
      external: false
   cidata:
      external: false
Make sure you are located in the directory where the “docker-compose.yml” file is stored. Then create the containers in the background by running
docker-compose up -dYou should get an output similar to the following:
Creating volume "plsqlcop_sonardata" with default driver
Creating volume "plsqlcop_cidata" with default driver
Creating ci ...
Creating sonar ...
Creating sonar
Creating sonar ... done
3. Install PL/SQL Cop for SonarQube
To install the current version of PL/SQL Cop for SonarQube within the “sonar” container run
docker exec sonar wget --no-check-certificate https://www.salvis.com/blog?ddownload=6822 -O \
/opt/sonarqube/extensions/plugins/sonar-plsql-cop-plugin-2.1.1.jar
Windows users please note, that the \ (backslash) at the end of the first line is just the Unix line-continuation character (as the ` (grave accent) in PowerShell), you should omit it. The wget command will be executed within the sonar container.
To load the plugin we need to restart the container.
docker restart sonar4. Install PL/SQL Cop (Command Line Utility)
To install the current version of PL/SQL Cop within the “ci” container run
docker exec -u 0 ci wget --no-check-certificate https://www.salvis.com/blog/?ddownload=6680 -O /opt/tvdcc.zip
docker exec -u 0 ci unzip /opt/tvdcc.zip -d /opt
docker exec -u 0 ci bash -c "mv /opt/tvdcc-* /opt/tvdcc"
docker exec -u 0 ci rm /opt/tvdcc.zip
Why do we need to install this component in the “ci” container and not in the “sonar” container? Well, the SonarQube scanner is executed in the “ci” container and gets the code analyzer from the SonarQube server. This increases the scalability of the code analyzers since just the analysis reports need to be sent to the SonarQube server. However, the PL/SQL Cop SonarQube plugin is a wrapper to the command line utility. This means that every Jenkins agent needs to have PL/SQL Cop installed in the location configured on the SonarQube server.
In an environment with multiple servers and multiple Jenkins agents, the PL/SQL Cop installations need to be identical on every agent.
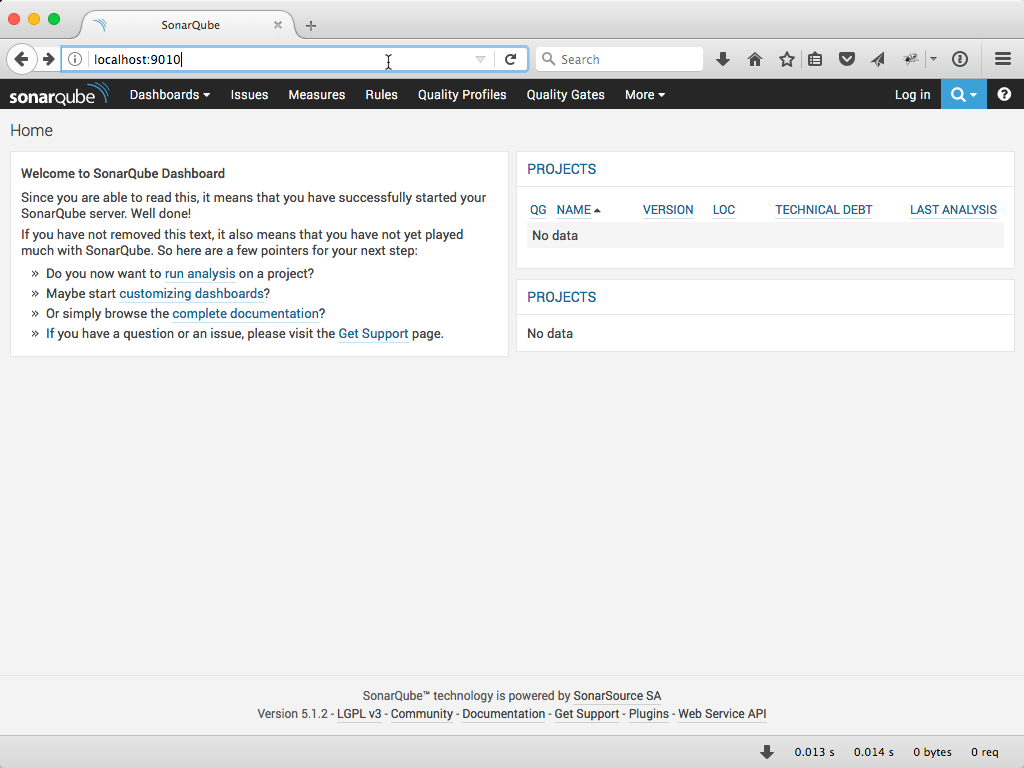
5. Configure SonarQube
Open “http://localhost:9010” in your web browser.
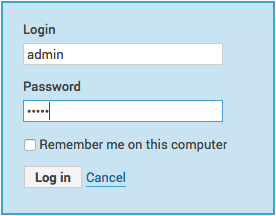
Press “Log in” in the upper right corner and login into SonarQube with the username “admin” and password “admin”.
Click on “Settings” and the Category “Trivadis PL/SQL Cop” and change the “Path to PL/SQL Cop command line tvdcc executable” to “/opt/tvdcc/tvdcc.sh”.
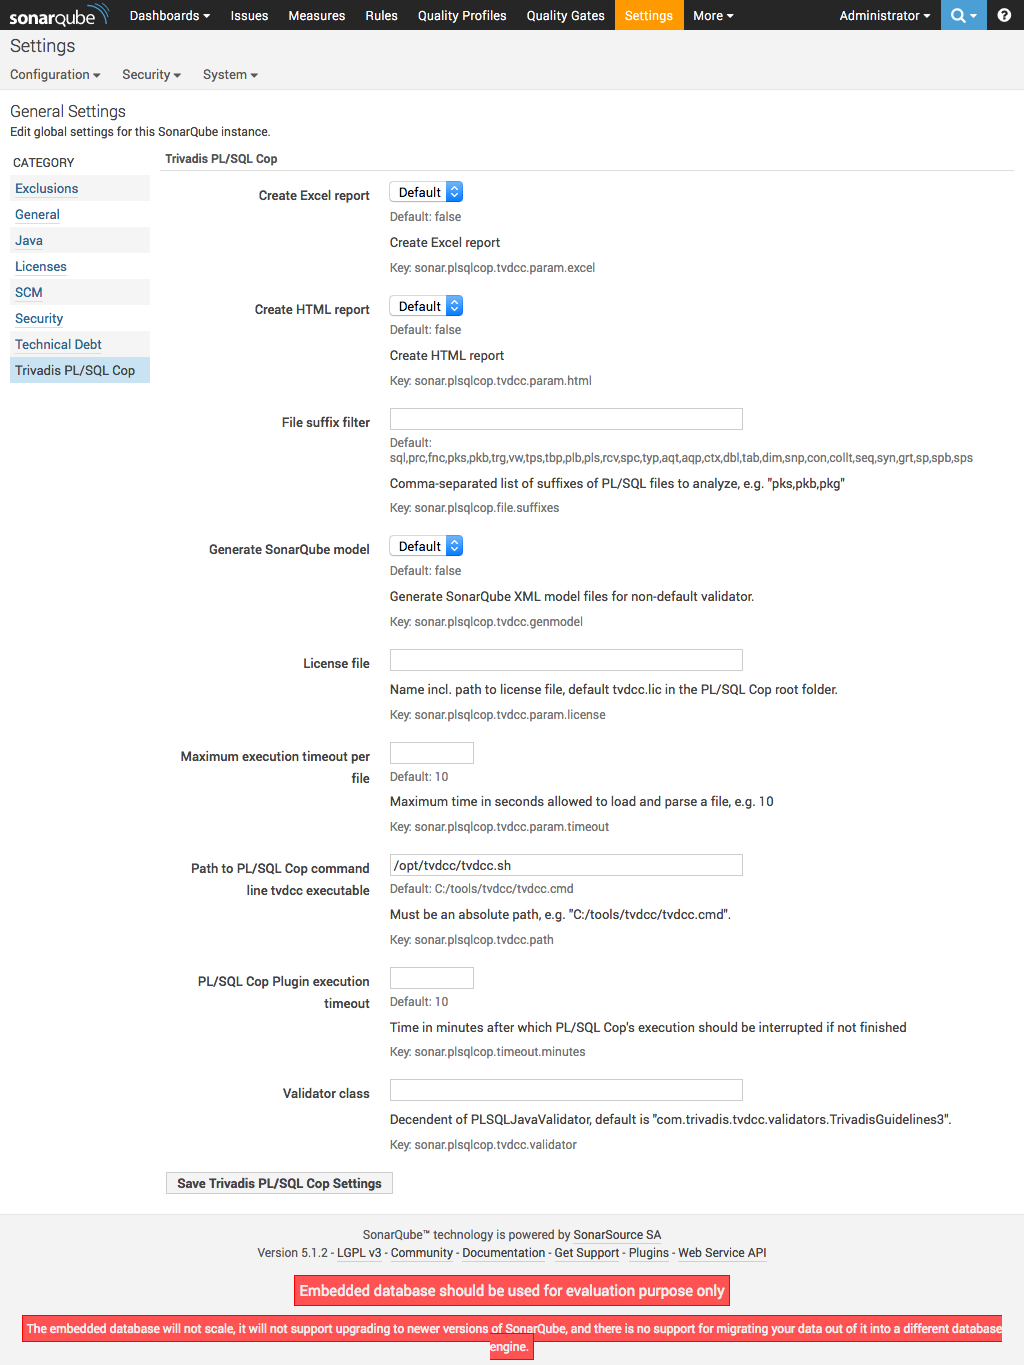
Press “Save Trivadis PL/SQL Cop Settings” and your done.
6. Configure Jenkins
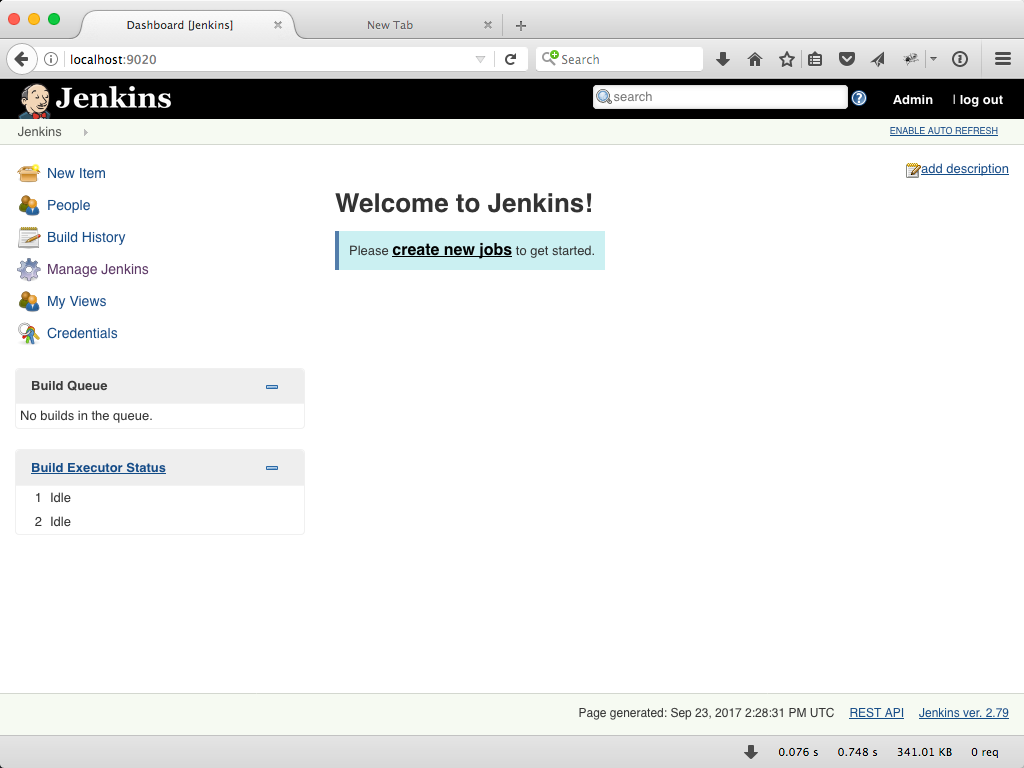
Open “http://localhost:9020” in your web browser.
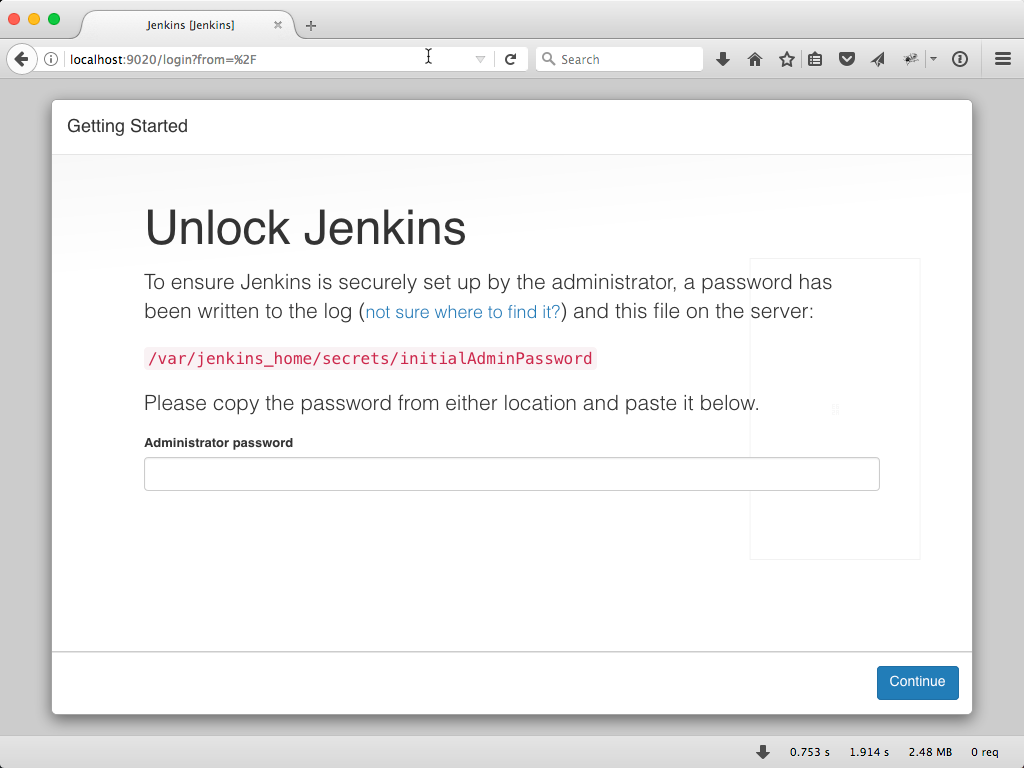
Jenkins generated during the container creation a password for the user admin. To get this password execute in a terminal window the following:
docker exec ci cat /var/jenkins_home/secrets/initialAdminPasswordCopy the output into the clipboard and paste it into the “Administrator password” field in the browser window and press “Continue”.
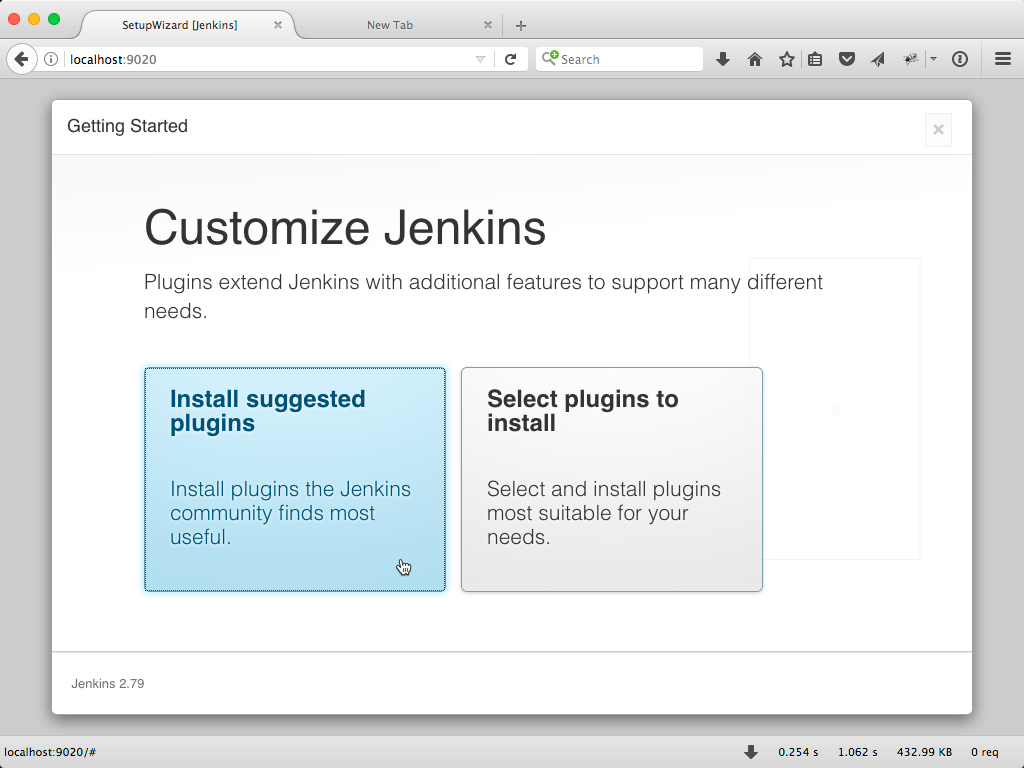
Press on “Install Suggested Plugins”
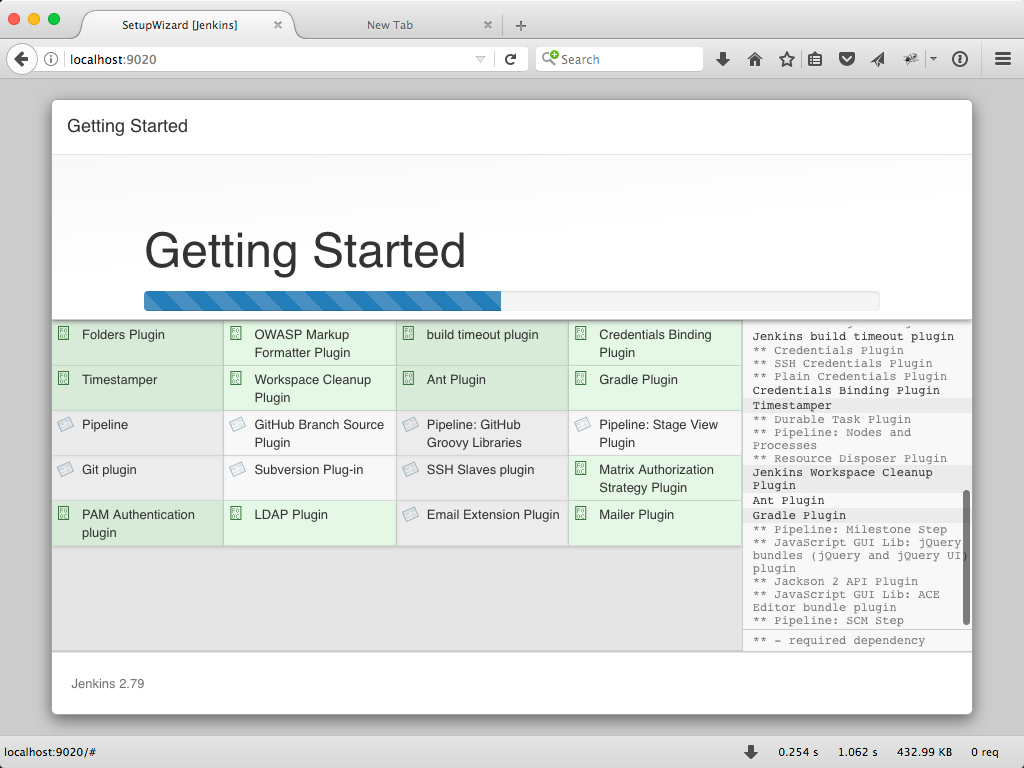
Wait until all plugins are installed.
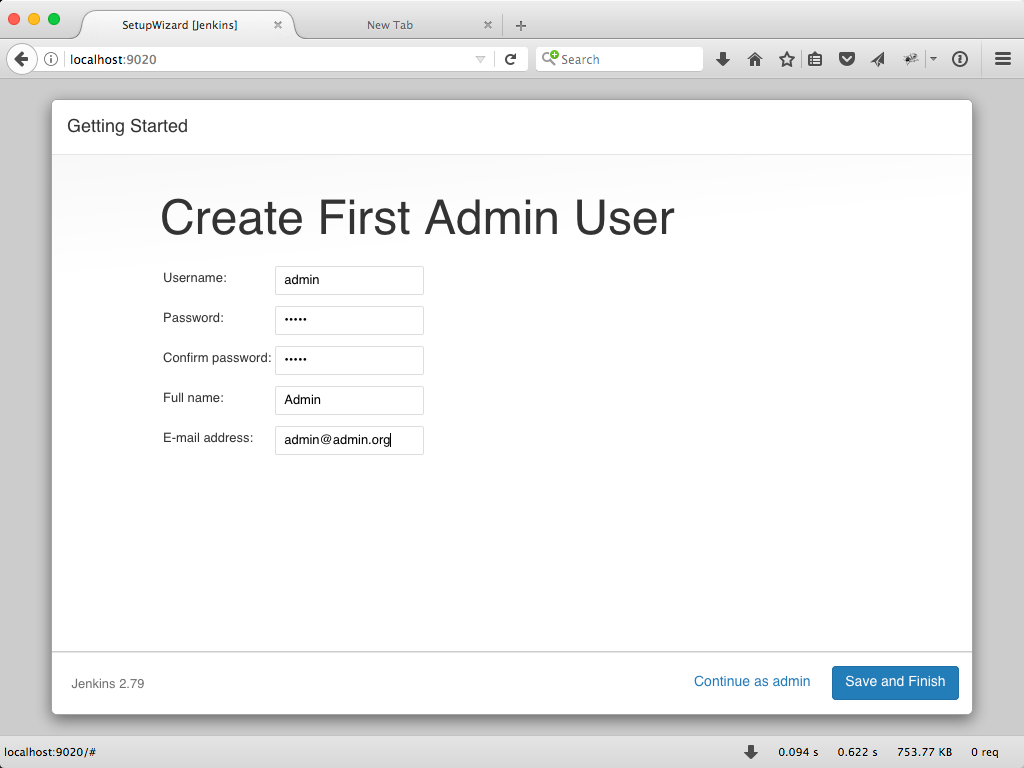
Enter the requested fields and press “Save and Finish”. And on the next page Click on “Start Using Jenkins”
Click on “Mange Jenkins”.
Click on “Manage Plugins”.

Select “SonarQube Scanner for Jenkins” in the “Available” tab. Use the filter to find the entry. Press “Install without restart”.
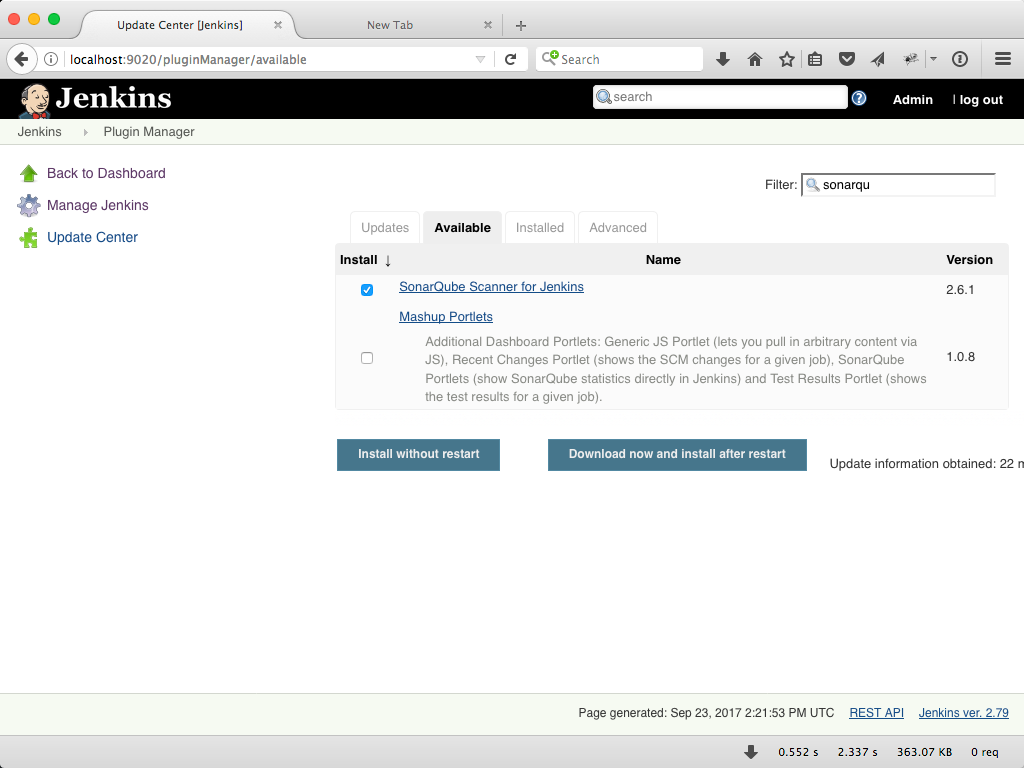
Click on “Go back to top page” when the plugins have been installed successfully.
Click on “Manage Jenkins” (again) and then on “Global Tool Configuration”.
Within the Global Tool Configuration click on “Add SonarQube Scanner”, add a name for the scanner and press “Save”.

Click on “Configure System”.
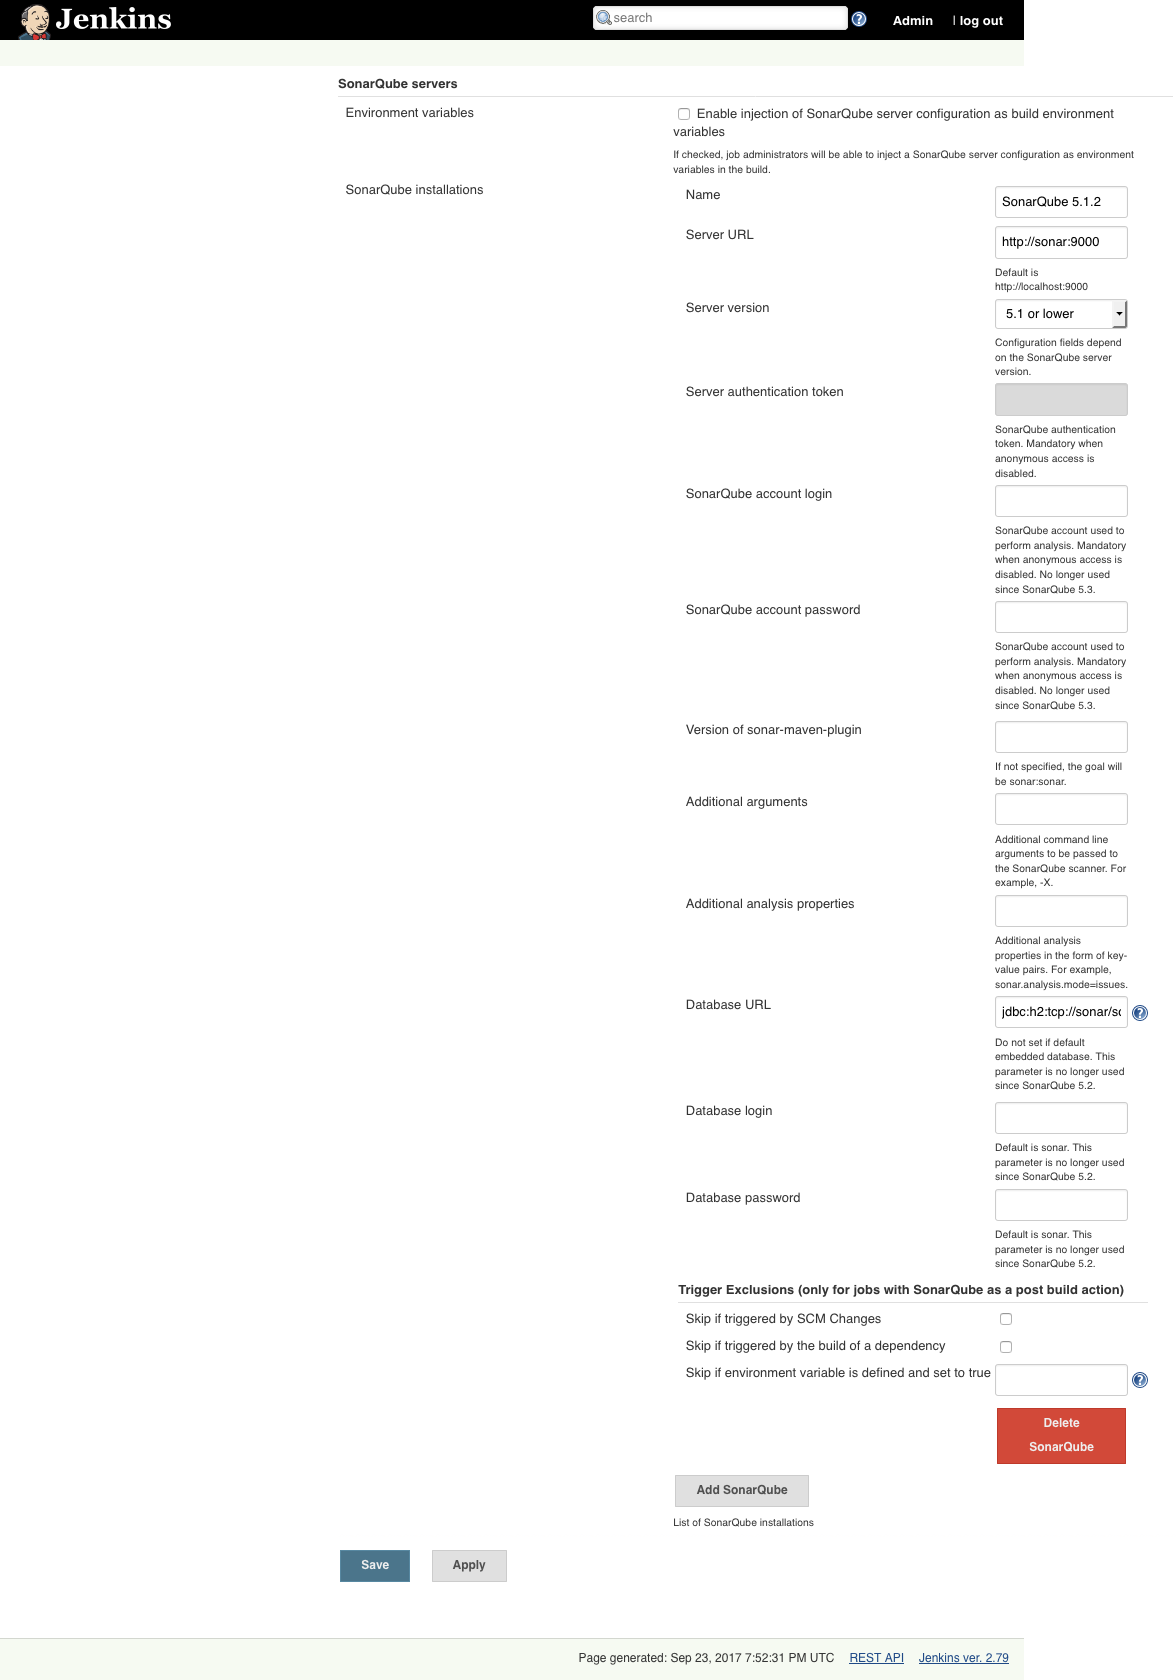
Scroll down to the “SonarQube servers” section and click on “Add SonarQube”.
Enter “SonarQube 5.1.2” for name, enter “http://sonar:9000” for “Server URL”, select “5.1 or lower” in “Server version” and enter “jdbc:h2:tcp://sonar/sonar” for “Database URL”. Click on “Save” to complete the Jenkins configuration.
Please note, that we are accessing the host sonar via the internal network Docker Compose has set up for us. Therefore we have to use the default port 9000 and not port 9010 which we are using from outside, e.g. to access SonarQube in the web browser.
7. Create Code Analysis Job
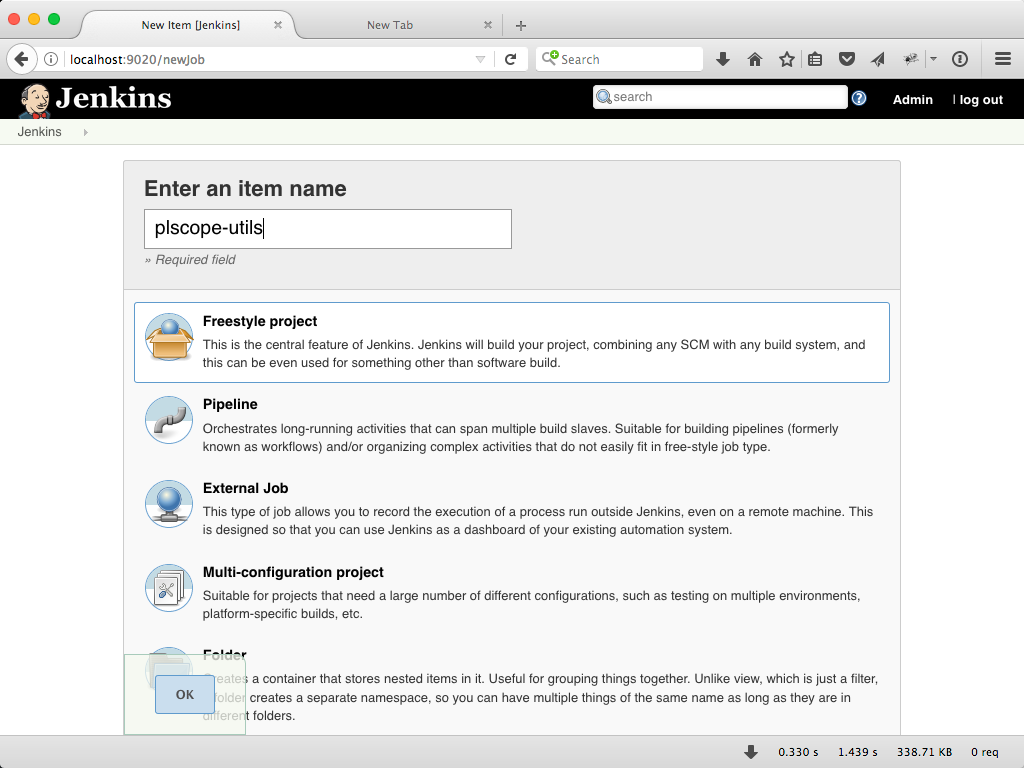
Click on “create new jobs”.

Enter “plscope-utils” and click on “Freestyle project”
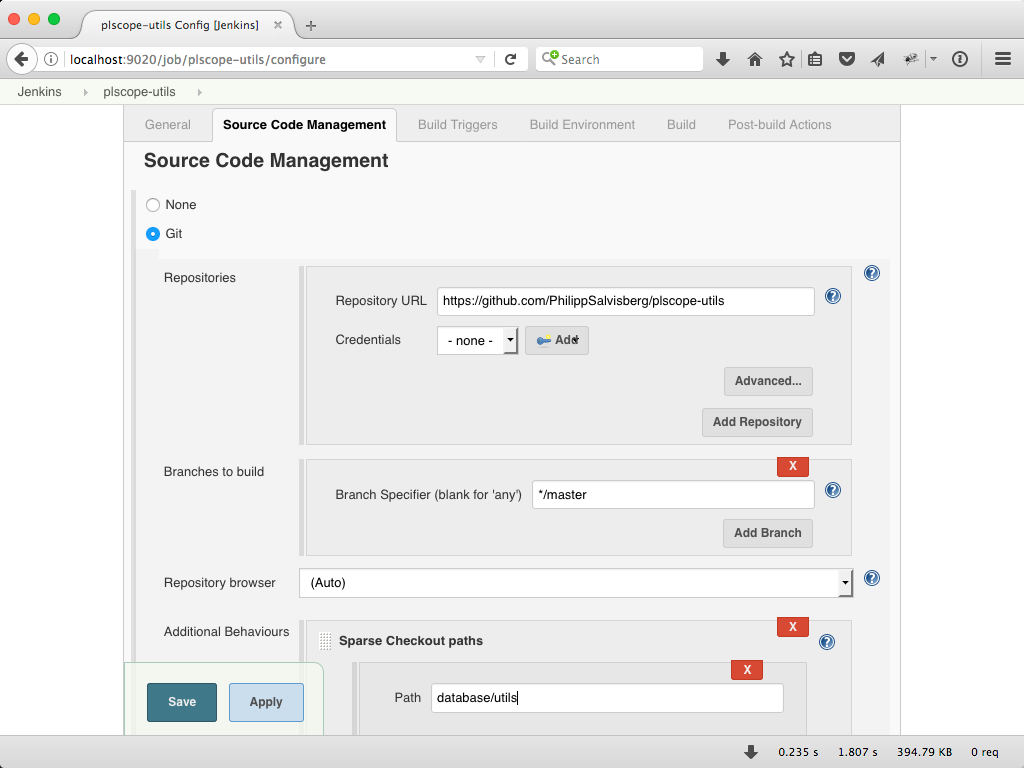
Click on the “Source Code Management” tab, select “Git”, enter “https://github.com/PhilippSalvisberg/plscope-utils” for “Repository URL”, add “Sparse Checkout paths” in “Additional Behaviours”, enter “database/utils” for “Paths” and click on “Apply”.
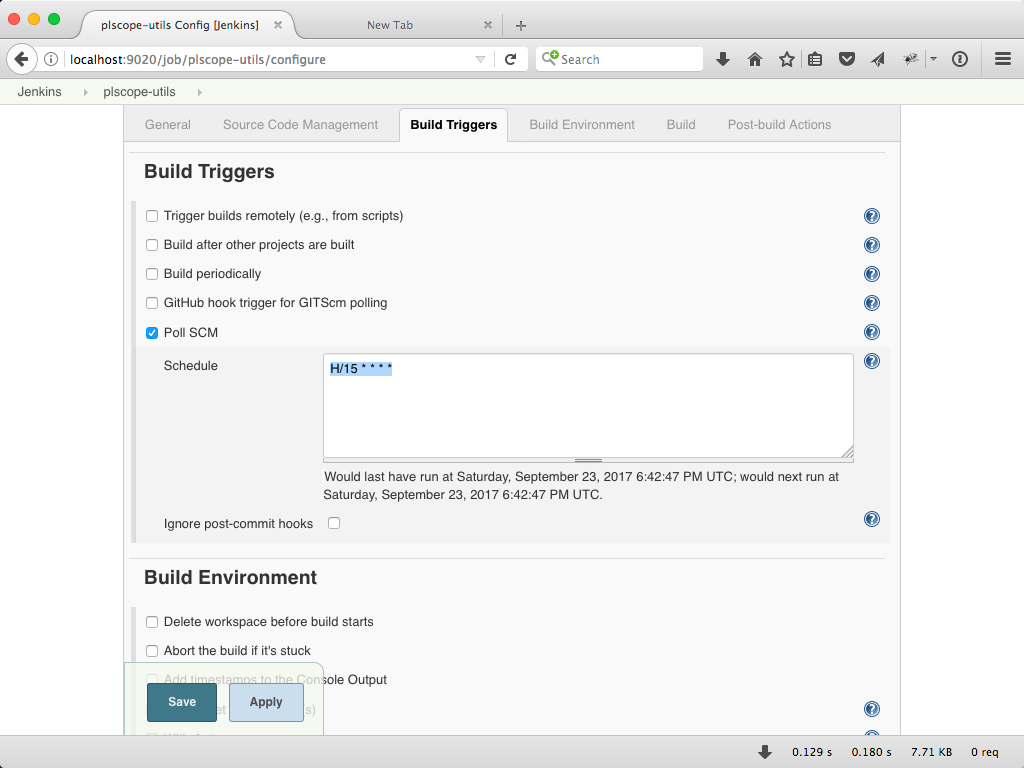
Click on “Build Triggers” tab, select “Poll SCM”. Enter “H/15 * * * *” for “Schedule” and press “Apply”. This will look for changes in the Git repository every 15 minutes and starts a build if a change is detected.
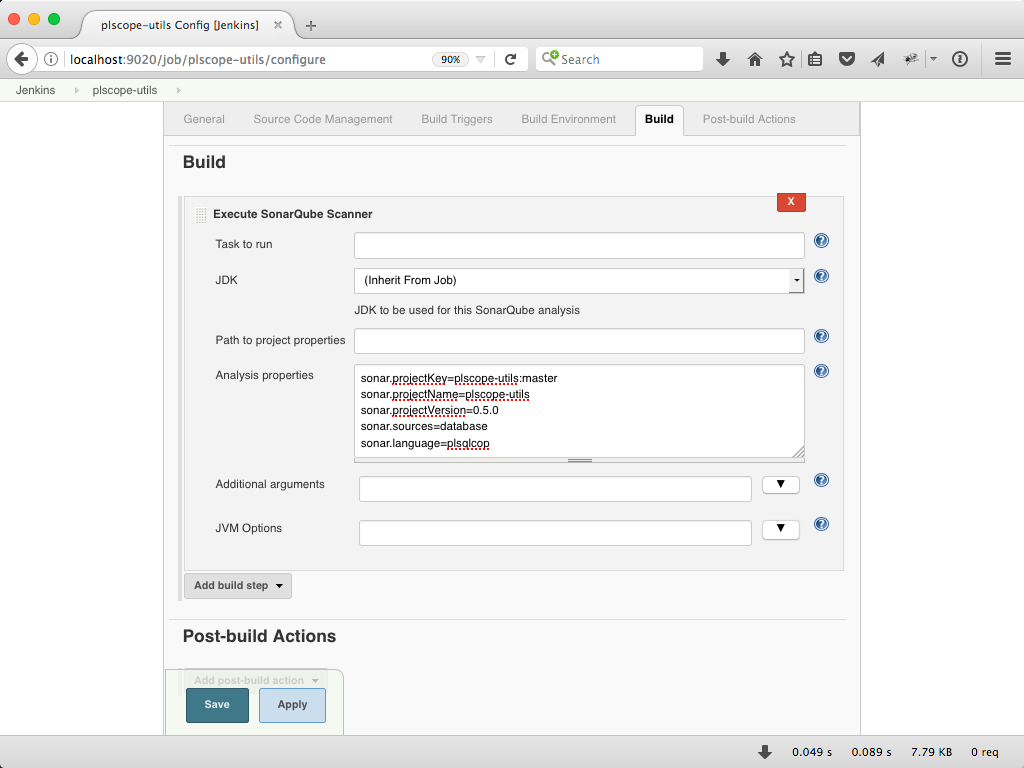
Click on “Build” tab and Scroll down to the Build section and add a “Execute SonarQube Scanner” build step.
Copy the following lines into the “Analysis properties”.
sonar.projectKey=plscope-utils:main
sonar.projectName=plscope-utils
sonar.projectVersion=0.5.0
sonar.sources=database
sonar.language=plsqlcop
and click on “Save”.
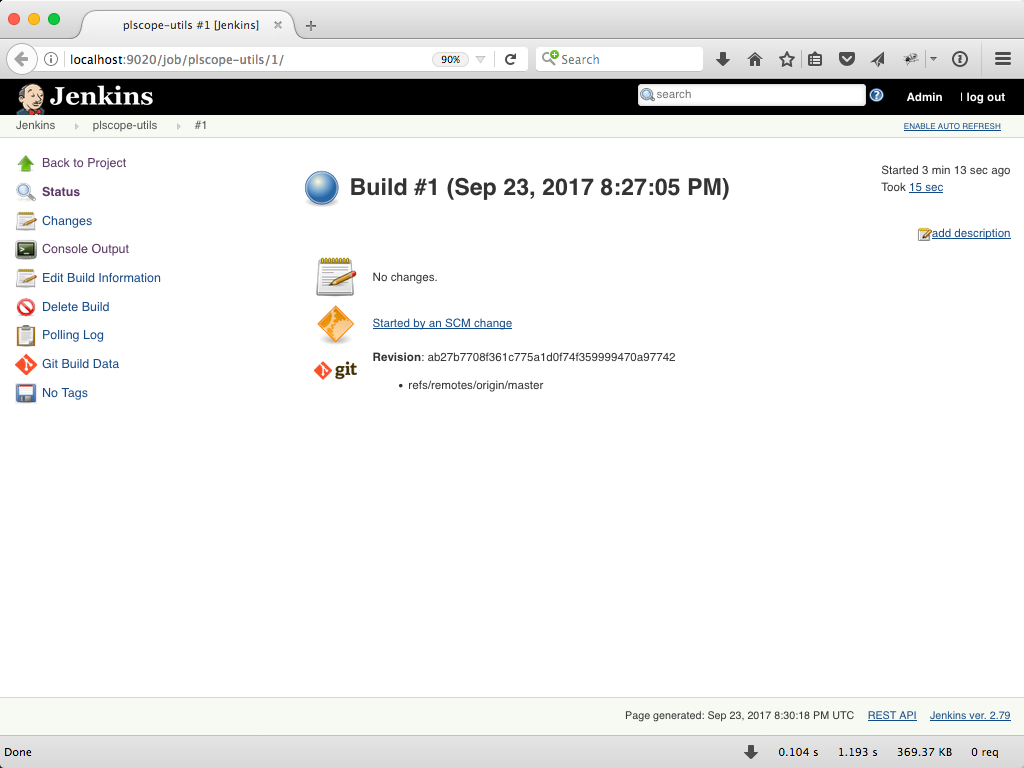
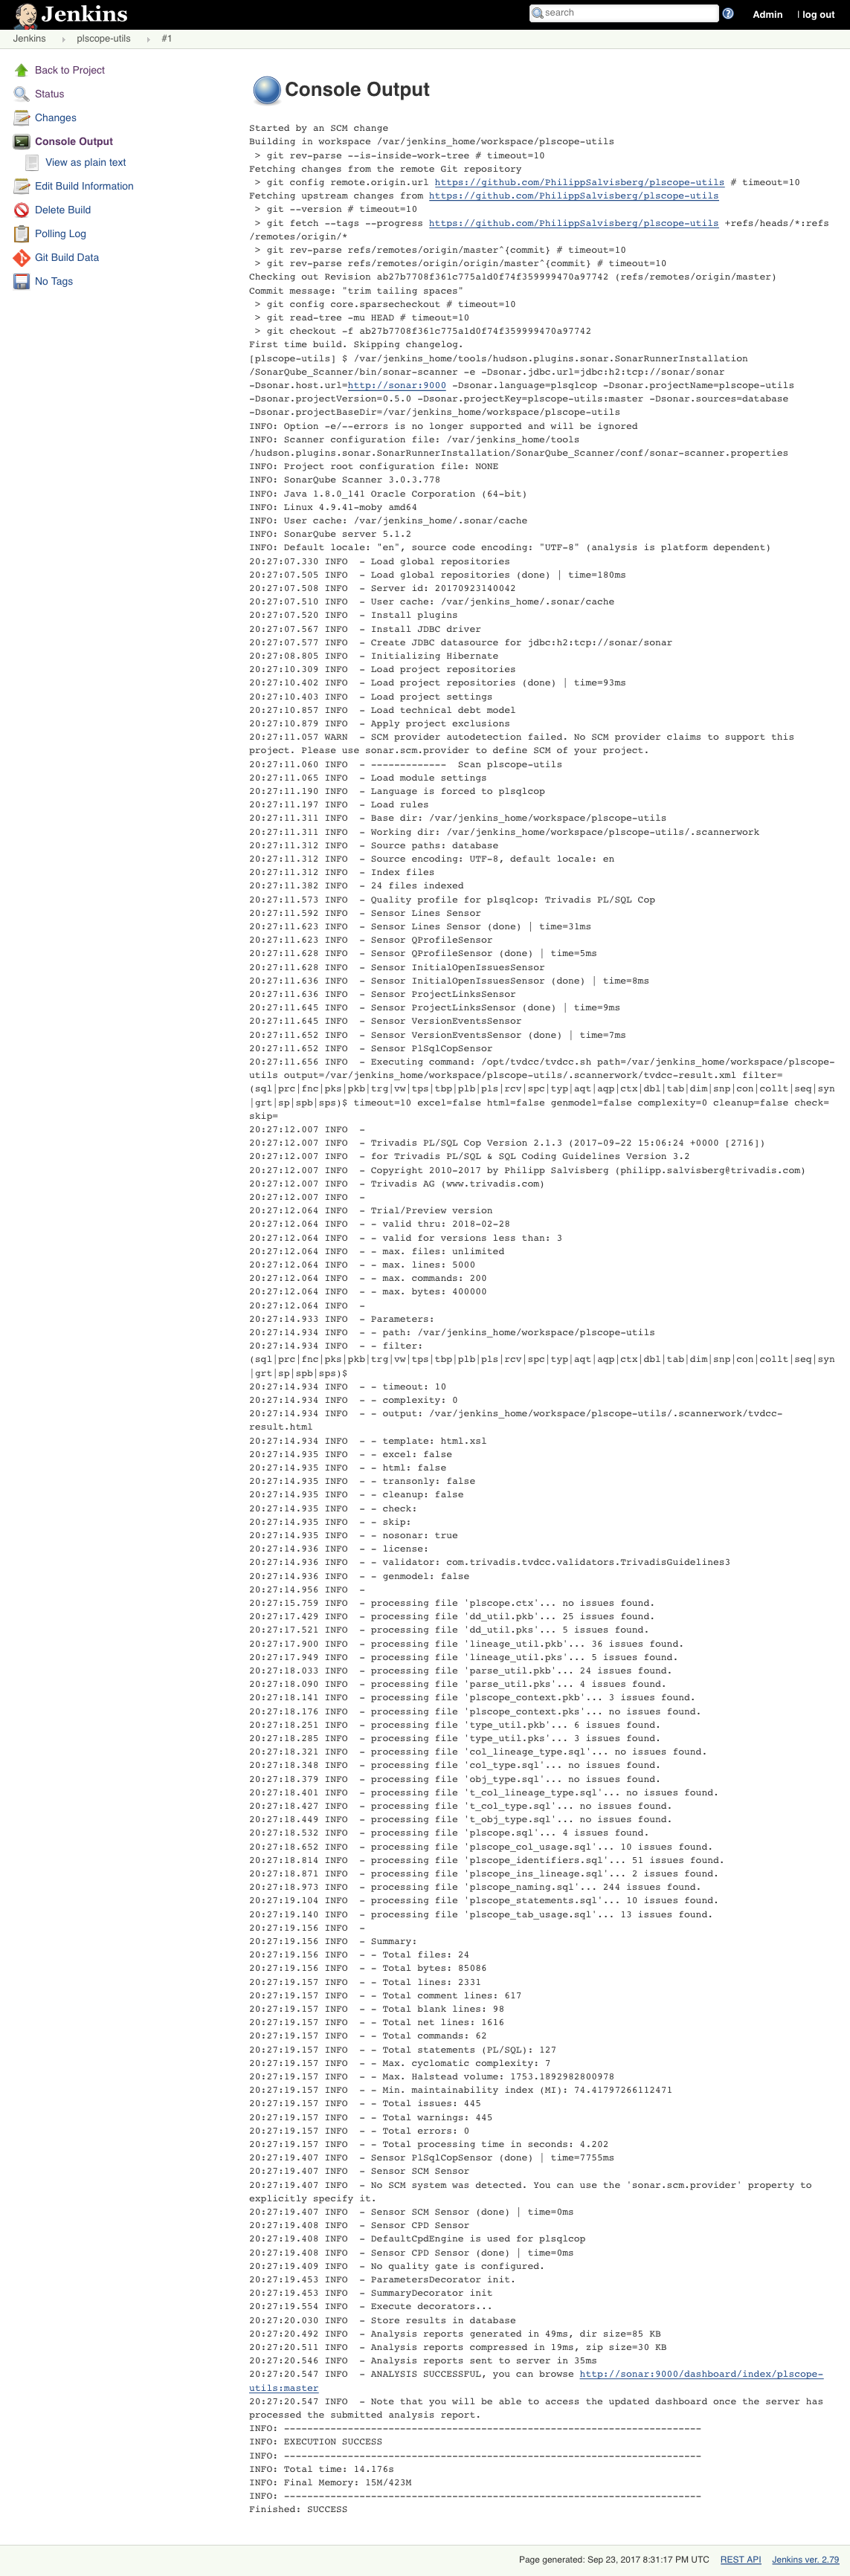
Wait until the initial build is started or click on “Build Now” and then on “#1” (the first build job in the Build History).

Click on “Console Output”.
The analysis result has been stored successfully in SonarQube and can now be queried via http://localhost:9010 .
Please note, that the link to SonarQube provided in the console output is not working, since it is referring a port of the internal Docker Compose network which is not accessible to your browser. However, it is possible to configure the external IP address and port for SonarQube in Jenkins and than this link will work.
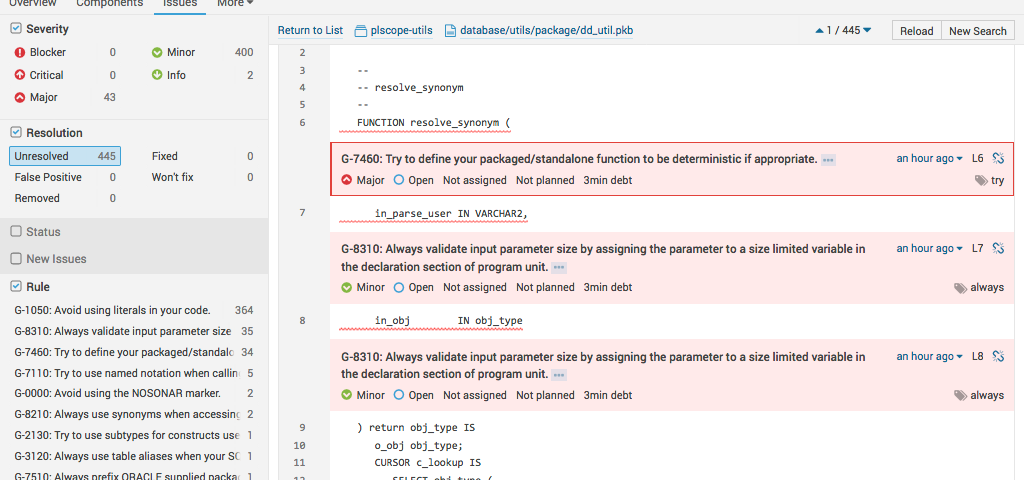
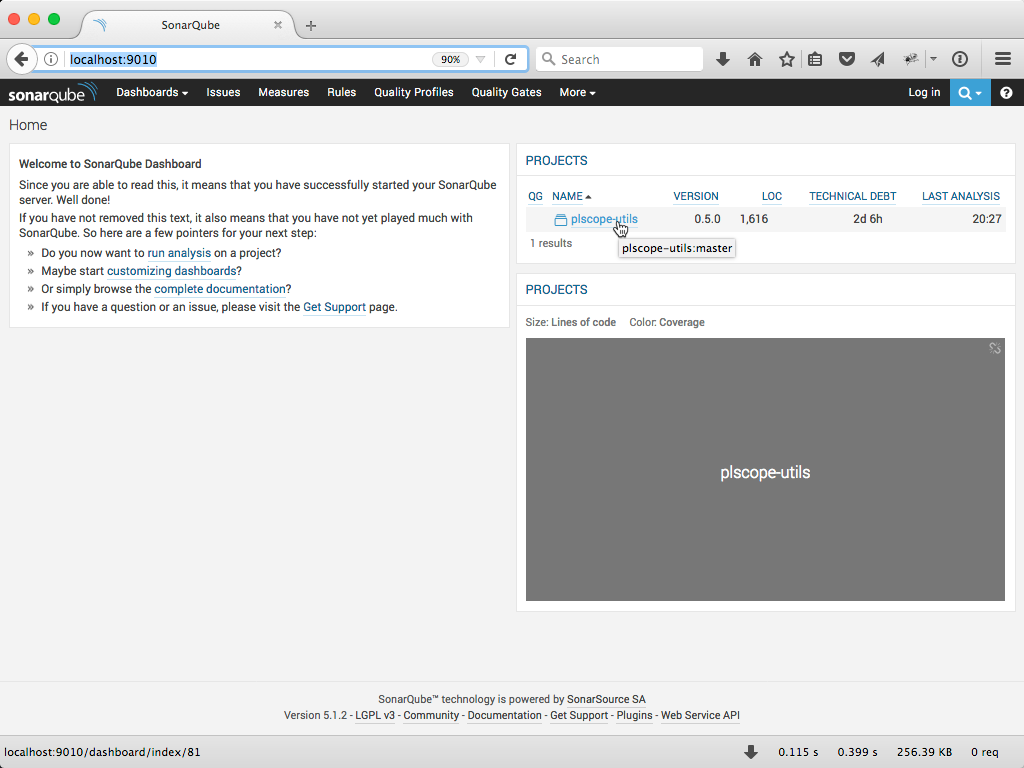
8. View the Result in SonarQube
Open “http://localhost:9010” in your web browser.
Click on “plscope-utils”, select the “Issues” tab for this project and select all rules.
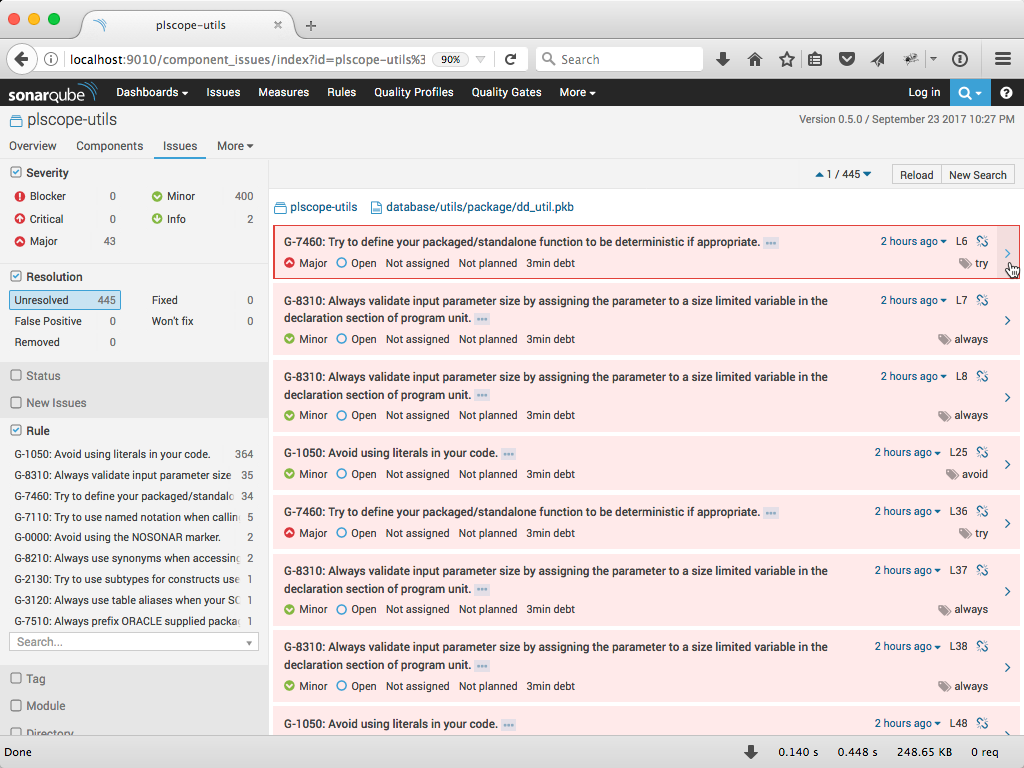
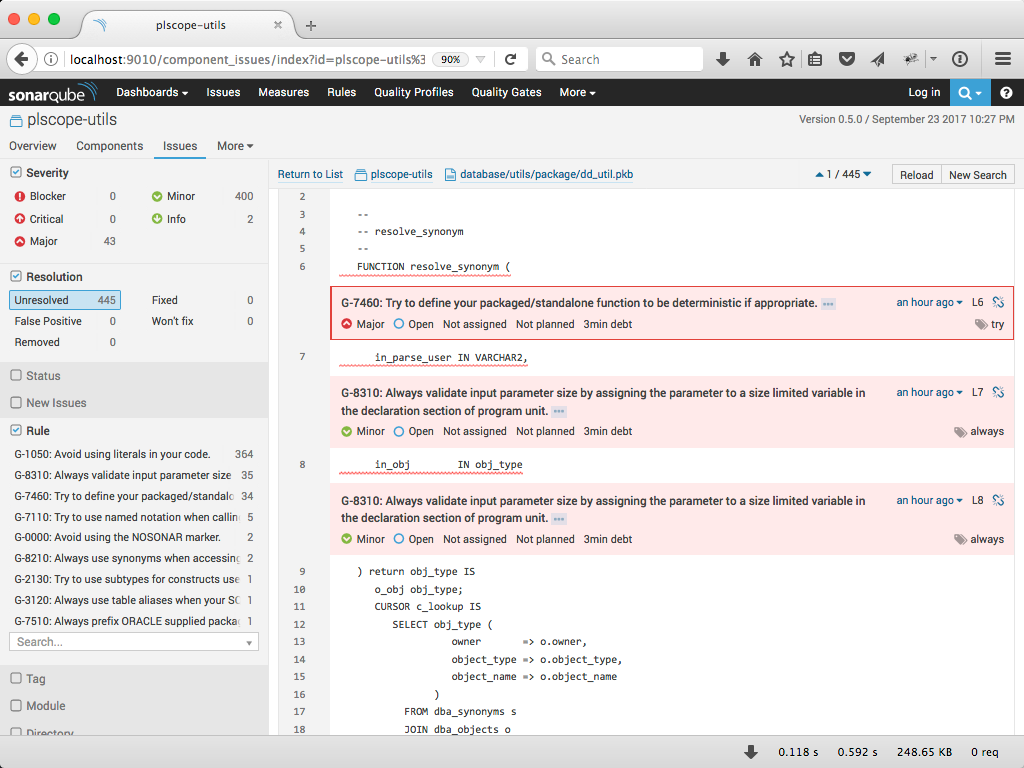
Click on “>” at the right side of an issue to see the source code line causing this issue.
See https://www.sonarqube.org/features/clean-code/ for more information.
9. Summary
Setting up a continuous code quality inspection environment for a PL/SQL project with Docker is quite simple. The audio-less video documents the complete process.
Granted, for production use, you need to use a different database as SonarQube backbone, define some roles, manage users and probably integrate an Active Directory. That should not be too difficult, at least not technically.
But the most challenging part will be to agree on some rules, adapt your development process and improve your code quality over time. So, let’s get started.